In this blog series, we’re exploring design for manufacture from its conception to the production line. Earlier, we explored the inspirations and the objectives that drive innovative designs. Then, in Part 3, we discussed how limits from material properties and process can help shape the final product. In this article, let’s see how we can maximize the potential without increasing the part count. This might also help us cut waste, make assembly and manufacturing easier, and reduce the risk of costly redesigns.
Maximize the Potential with Future-Proofing
Before finalizing a detailed drawing set for fabrication, we will push the boundaries to see what more we can achieve within its design space. Between the thin lines drawn by its intents and the solid edges of the constraints we’ve placed, there is always room for improvement.
So, we should ask ourselves questions like these: What can we alter to make it easier to manufacture, assemble, or use? What else can we nudge to make it shorter, quieter, or more eye-catching? Can we enhance the user experience with quick release access panels, slide-out filters, or tool-free maintenance? Is there unused space where future storage devices can be mounted without creating additional support brackets? Are there alternate components that might share the same mounting bracket, but with reversible or overlapping hole patterns? Where parts appear similar, can we make them identical to reduce the part count? Or, can we make them unique enough so that the assembler does not unintentionally interchange them? This kind of testing refines the design into something that exceeds your expectations, and makes your product really stand out.
To prevent mistakes, we should also examine the hardware we plan to use. It’s our policy to always take the extra step to model every screw and connector. This allows us to verify that each one is accessible, and that there is enough clearance for screwdrivers and other tools. We must also check that the thread length and heads of the screws chosen don’t interfere, especially when other parts have to slide past for assembly. By considering the order of assembly now, at design time, we will save costs down the line at the assembly stage and prevent last-minute modifications.
Get More Functionality with Less Cost
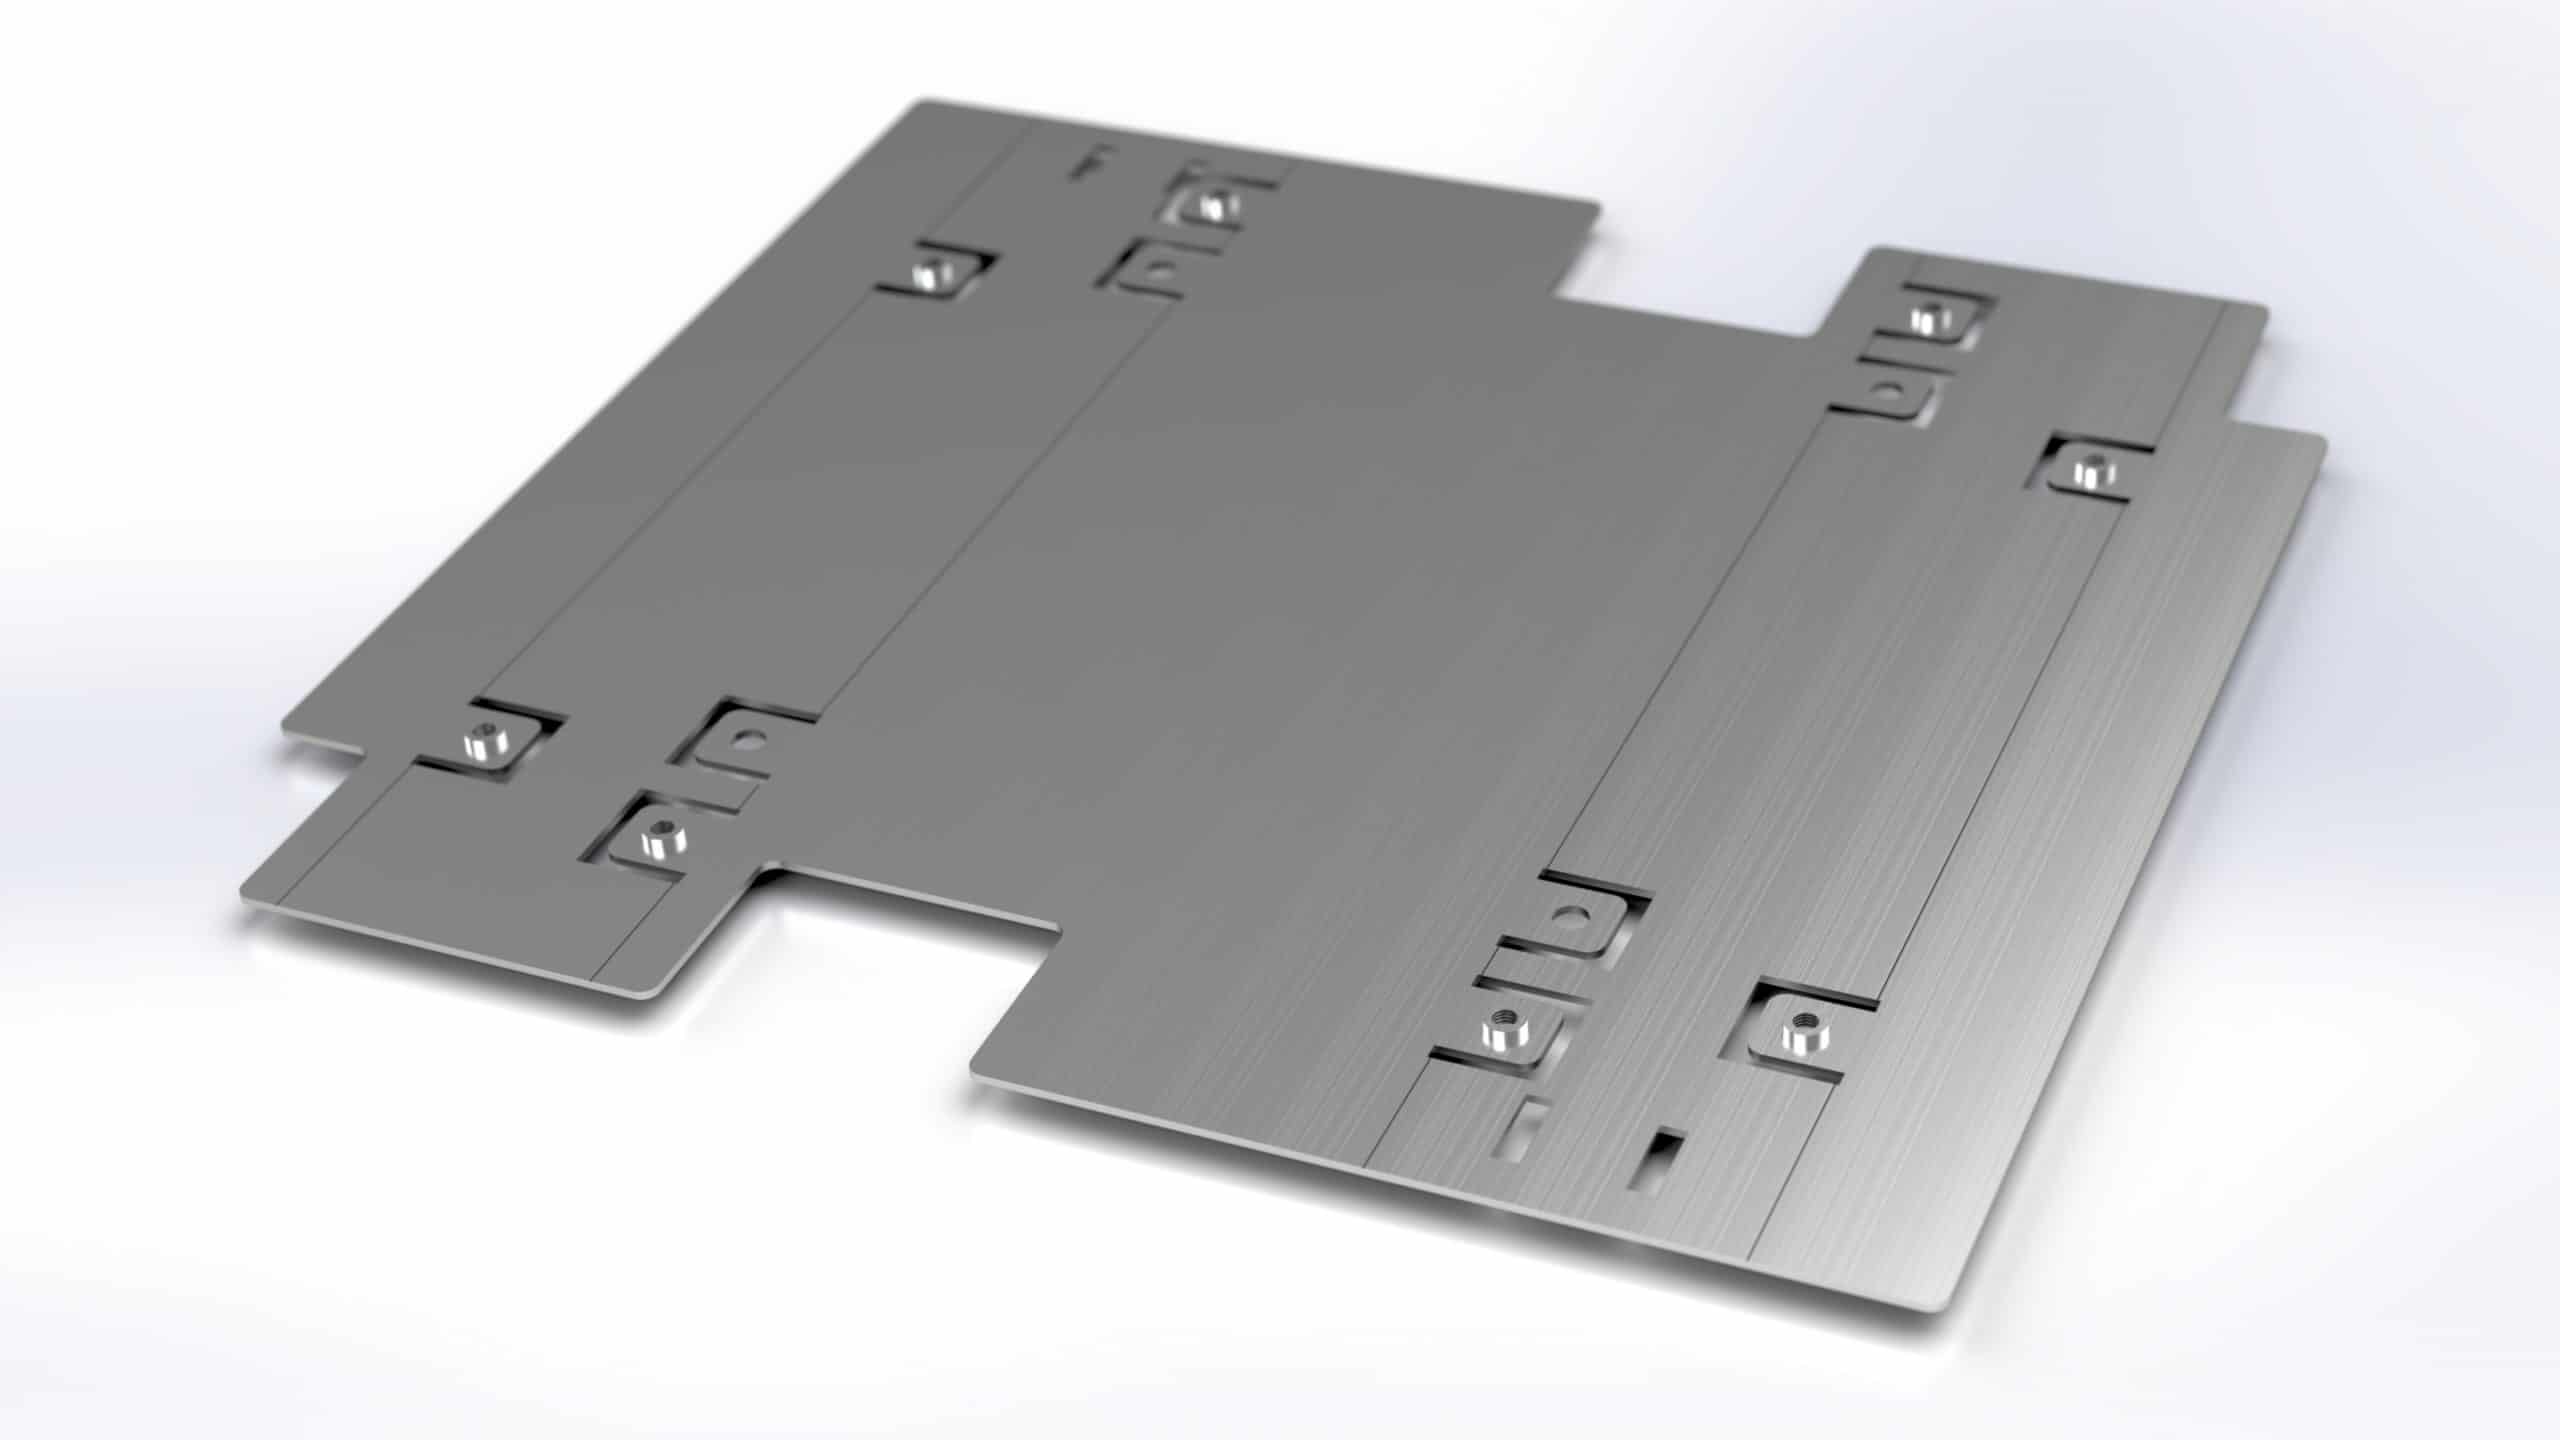
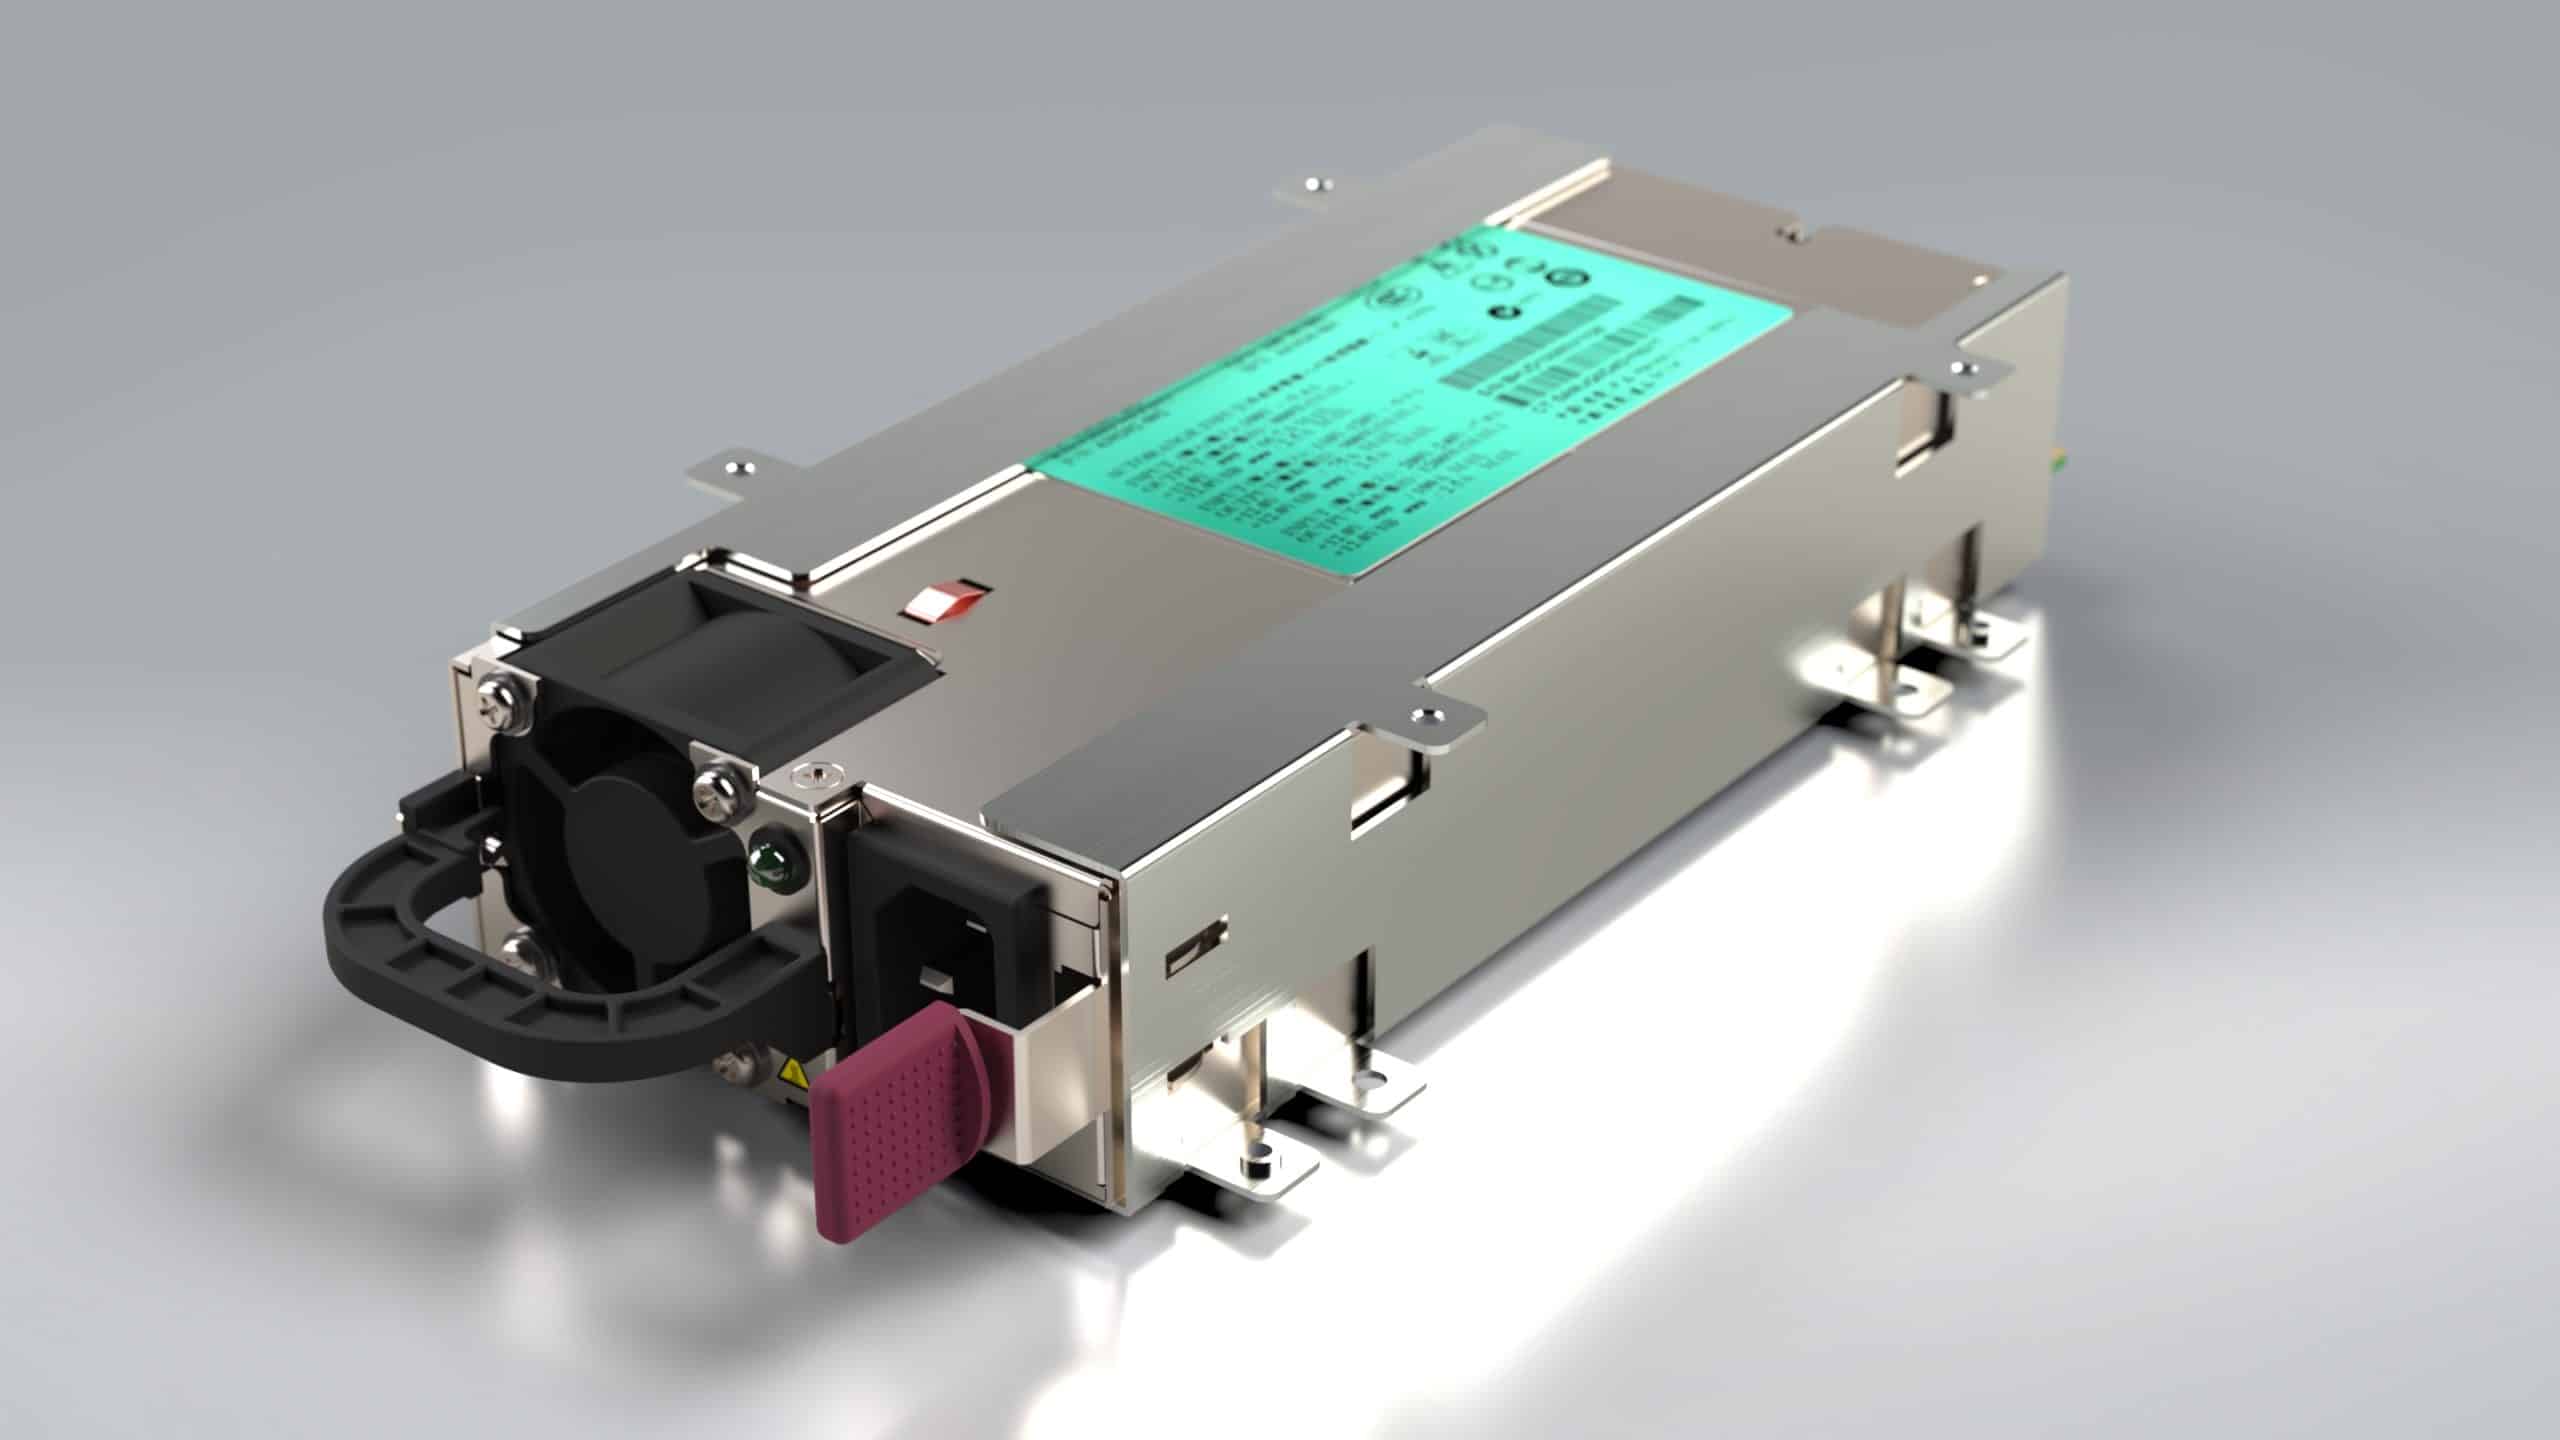
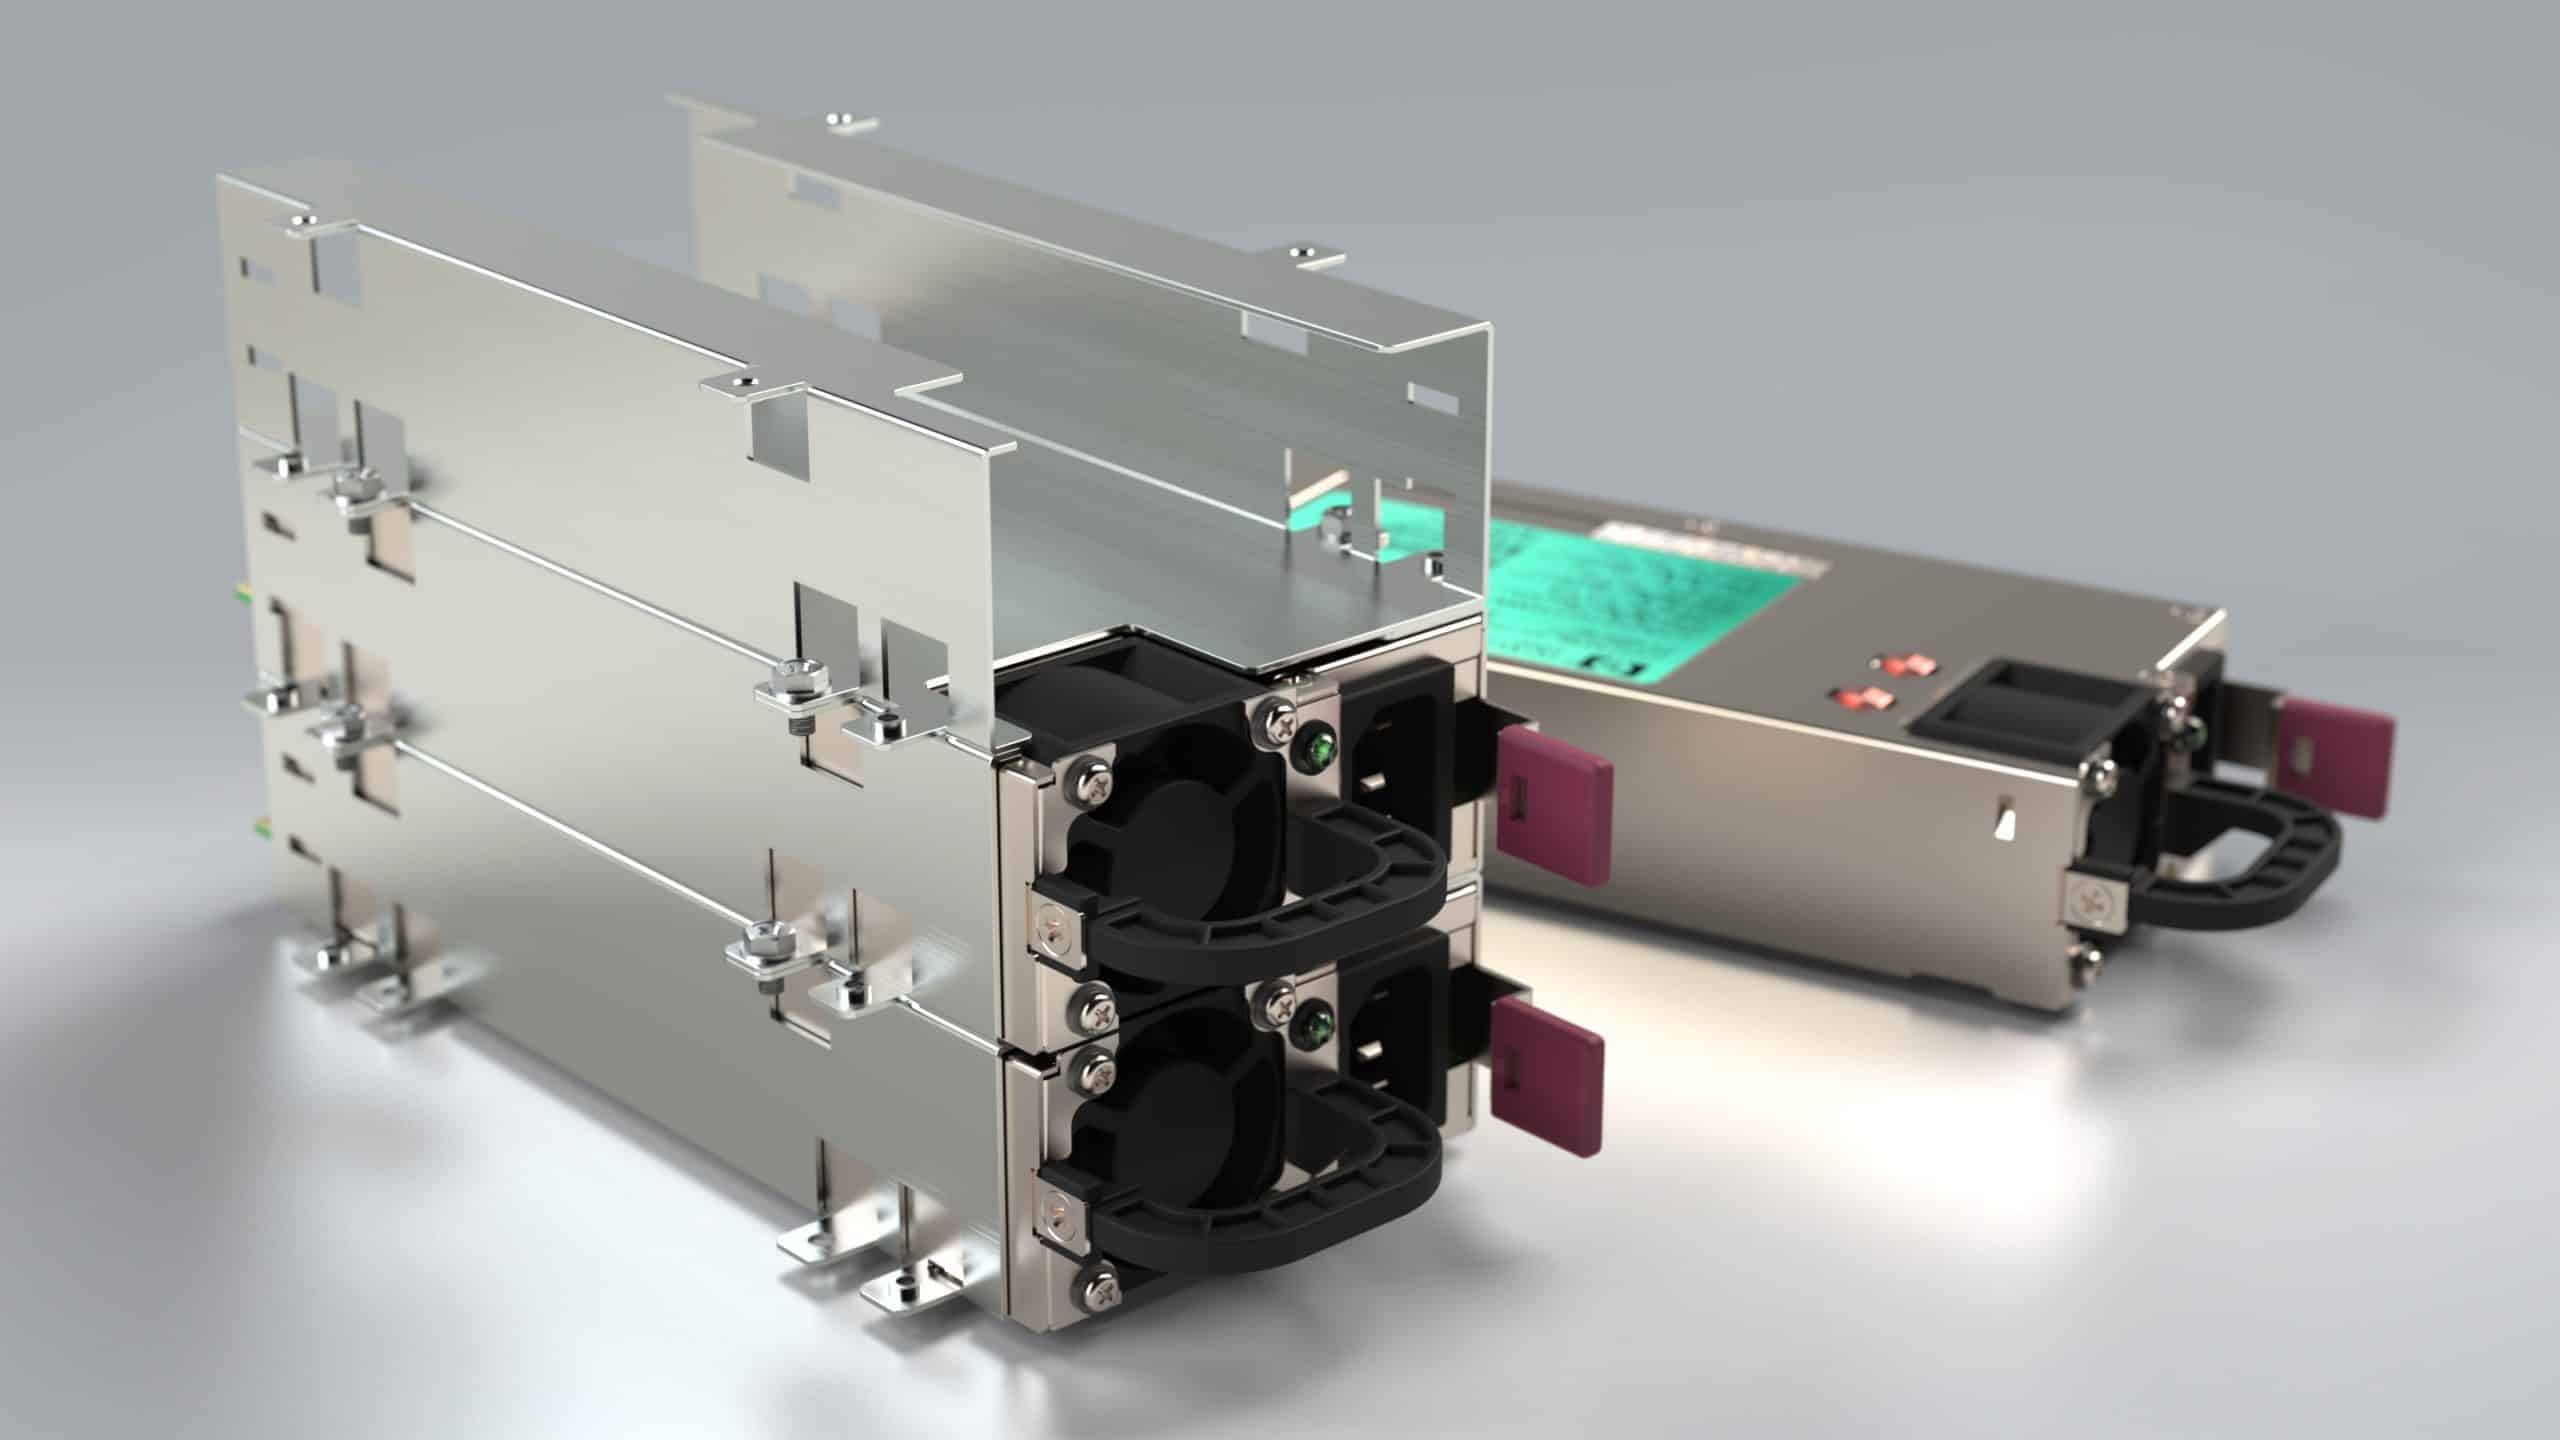
In this example, the customer is using an array of removable power modules as an inexpensive way to power cryptocurrency mining rigs. Their modular system is expandable by adding more power or compute modules as needed. So, some cases have just one, while other larger options can support three or more removable power supplies. The original version of the chassis required us to design several different sizes of cage brackets to allow the power modules to slide out for maintenance. Those large cages typically require many bend operations to form the support tabs that the modules rest on. This meant more unique parts, and more manufacturing operations per part.
By simplifying this design with a single reversible bracket, we were able to greatly reduce the cost of the power module cages. In its flat form, the fastener tabs are cut with a common U-shaped punch adjacent to the bend lines. So, with only four bend operations, all the features of the bracket take shape. When rotated 180°, these identical brackets can be stacked indefinitely. We have slightly offset the tabs from each other from the left side to the right. In this way, they do not interfere with the shaft of the screwdriver used to assemble them. Using multiple instances of one identical bracket in different ways turns out to be far less expensive than making fewer unique brackets.
Take it to the Limit
Your custom chassis design will go through many adjustments and tweaks along the way. In the end, it has to fit your budget and fill the niche it was meant for. But, we prefer to deliver a product with even greater potential – one that can grow with your business. While we refine it and make these improvements we’ll keep you in the loop, relying on your feedback and approval. Next, in part 5, we’ll see how we clearly communicate these design ideas to you.